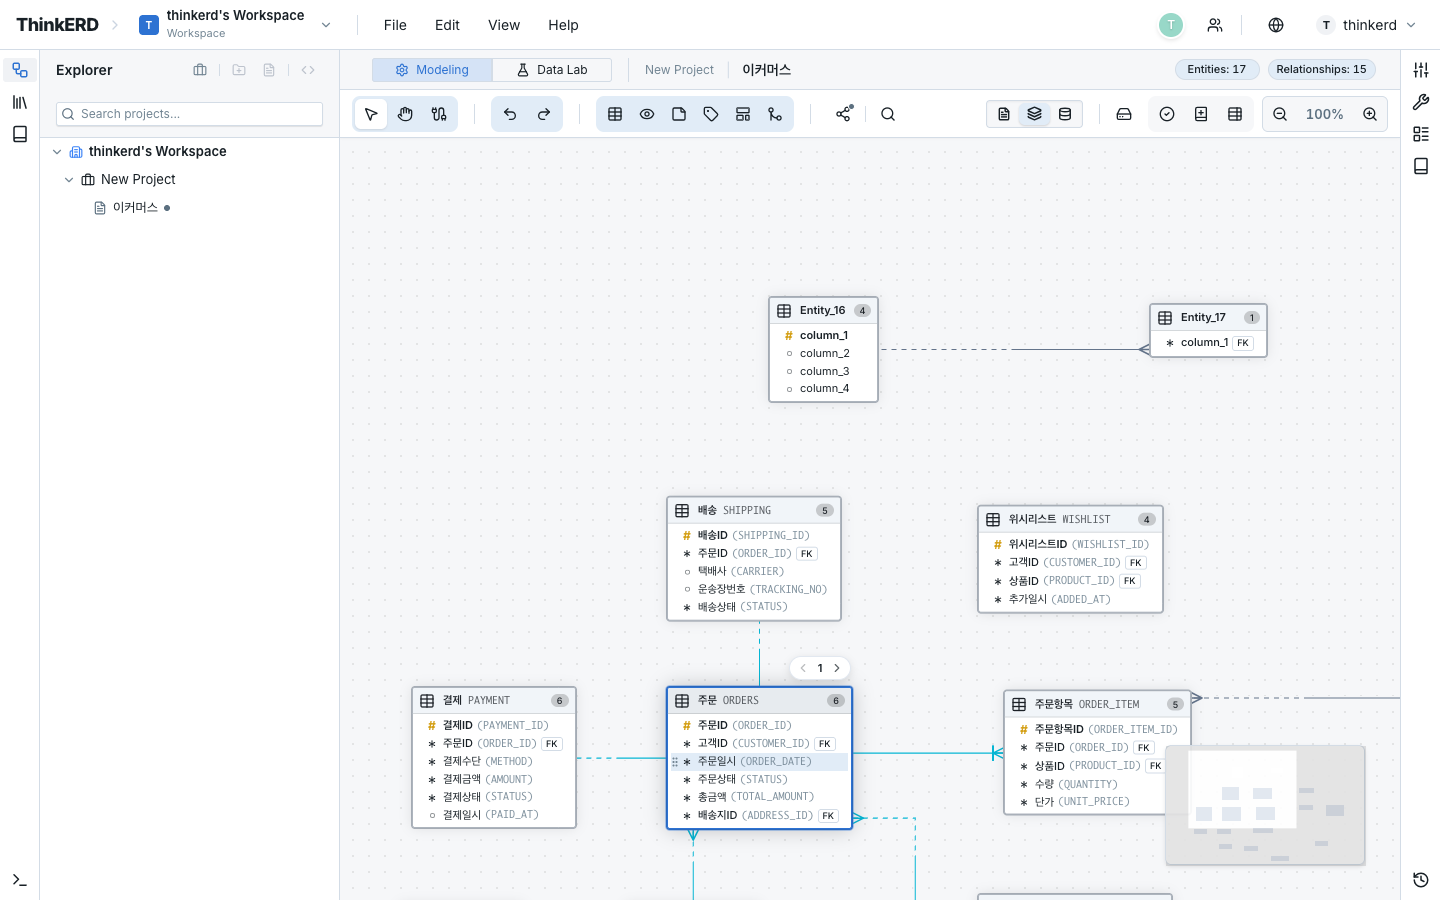
Entity Management
Entities are the fundamental building blocks of an ERD, representing a collection of data managed by the business. In relational databases, they correspond to tables, and each entity has attributes (columns) and identifiers (PK).
Creating Entities
Two ways to add entities to the canvas:
| Method | Action |
|---|---|
| Toolbar | Click the Add Entity icon in the top toolbar |
| Context Menu | Right-click on an empty canvas area → Add Entity |
Created entities are placed on the canvas with a default name (NewEntity). Drag them to your desired position.
Editing Entities
Double-click an entity or right-click → Edit to open the edit dialog.
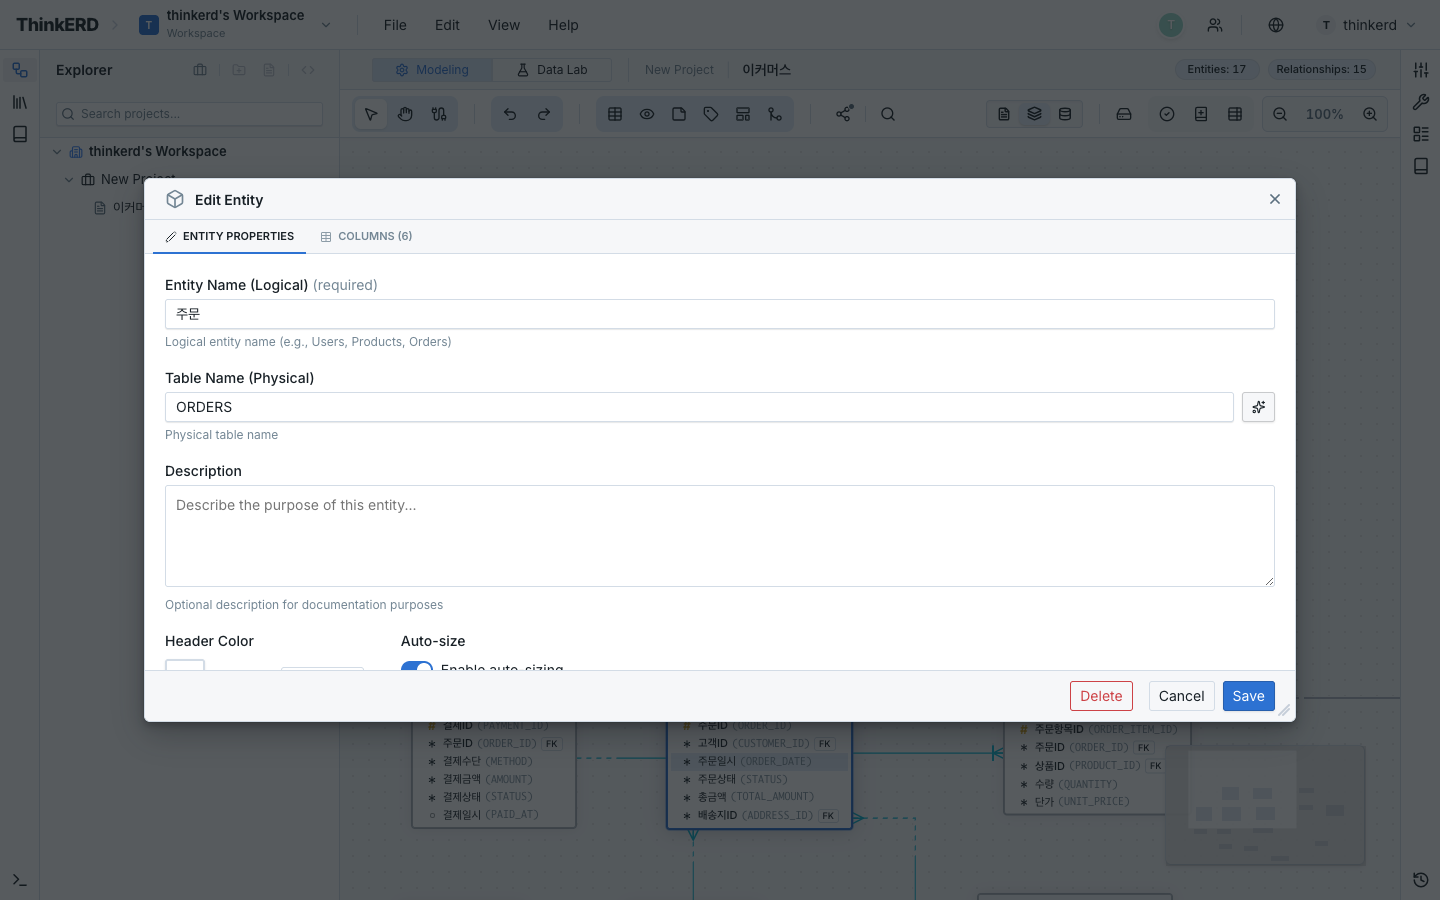
Basic Properties
| Property | Description | Use Case |
|---|---|---|
| Logical Name | Business-friendly name (shown in logical mode) | Business communication, stakeholder review |
| Physical Name | Table name (shown in physical mode) | DDL generation, developer handoff |
| Description | Descriptive memo for the entity | Data dictionary, team sharing |
Naming Conventions
- Logical Name: Use business terminology (e.g.,
Customer,Order,Product) - Physical Name: Use standardized abbreviations (e.g.,
CUSTOMER,ORD,PROD) - Physical names typically use UPPERCASE + UNDERSCORE (
_) format - If standard words are registered, physical names are auto-generated from logical name input
Style Customization
Customize the visual properties of entities for domain differentiation or importance highlighting:
- Background color — Domain-specific color coding (e.g., order domain in blue, member domain in green)
- Border color — Highlight critical entities
- Resize — Drag entity corners to resize
Select an entity to display the Property Bar in the toolbar for instant color and style changes.
Column Management
Adding Columns
Click the + Add button in the column list of the edit dialog, or press Tab in the last column to add a new column.
Column Properties
| Property | Description | Barker's Notation |
|---|---|---|
| PK | Primary Key — unique identifier for the entity | Shown by UID Bar (left vertical bar) |
| FK | Foreign Key — automatically set when creating relationships | Visualized by relationship lines |
| Logical Name | Business attribute name | Shown in logical mode |
| Physical Name | Column name | Shown in physical mode |
| Data Type | VARCHAR, INTEGER, DECIMAL, DATE, etc. | — |
| NOT NULL | Required field | Expressed by optionality marker |
| UNIQUE | Uniqueness constraint | — |
Data Type Selection Guide
| Data Nature | Recommended Type | Example |
|---|---|---|
| Short text (names, codes) | VARCHAR(n) | Customer name, product code |
| Integer (quantities, sequences) | INTEGER | Order quantity, sort order |
| Currency, decimals | DECIMAL(p,s) | Order amount, exchange rate |
| Date | DATE | Order date, birth date |
| Date + time | TIMESTAMP | Created at, modified at |
| Long text | TEXT / CLOB | Remarks, detailed description |
| Boolean (yes/no) | BOOLEAN | Active flag, deleted flag |
Using Domains
Instead of manually specifying data types each time, define Standard Domains to automatically apply consistent types to columns of the same nature.
Reordering Columns
Reorder columns via drag and drop. By convention, PK columns are always positioned at the top.
Practical Example: E-Commerce ERD Design
Walk through the process of designing core entities for a simple e-commerce system.
Step 1: Identify Core Entities
Identify the data to be managed from business requirements:
| Entity | Logical Name | Physical Name | Description |
|---|---|---|---|
| Customer | Customer | CUSTOMER | Service user |
| Product | Product | PRODUCT | Product for sale |
| Order | Order | ORD | Customer's purchase action |
| Order Item | Order Item | ORD_DTL | Individual product within an order |
Step 2: Define Columns
Define attributes for each entity:
| PK | Column | Physical Name | Type | NOT NULL |
|---|---|---|---|---|
| ✅ | Customer No | CUST_NO | VARCHAR(20) | ✅ |
| Customer Name | CUST_NM | VARCHAR(100) | ✅ | |
EMAIL | VARCHAR(200) | |||
| Phone | TEL_NO | VARCHAR(20) | ||
| Join Date | JOIN_DT | DATE | ✅ |
| PK | Column | Physical Name | Type | NOT NULL |
|---|---|---|---|---|
| ✅ | Product Code | PROD_CD | VARCHAR(20) | ✅ |
| Product Name | PROD_NM | VARCHAR(200) | ✅ | |
| Unit Price | UNIT_PRC | DECIMAL(18,2) | ✅ | |
| Category | CTGR_CD | VARCHAR(10) |
| PK | Column | Physical Name | Type | NOT NULL |
|---|---|---|---|---|
| ✅ | Order No | ORD_NO | VARCHAR(20) | ✅ |
| FK | Customer No | CUST_NO | VARCHAR(20) | ✅ |
| Order Date | ORD_DT | DATE | ✅ | |
| Order Amount | ORD_AMT | DECIMAL(18,2) |
Step 3: Connect Relationships
Customer→Order: 1:N (one customer can have multiple orders)Order→Order Item: 1:N (one order contains multiple items)Product→Order Item: 1:N (one product can appear in multiple orders)
→ For relationship creation methods, see Relationships & FK.
Subtypes
Represent supertype–subtype relationships using Subtypes. For example, an Employee entity can be classified into Permanent, Contract, and Intern.
- Right-click on the entity → Define Subtype
- Configure in the subtype dialog:
| Field | Description |
|---|---|
| Discriminator | Specify the Discriminator Column |
| Subtype Items | Add sub-types (e.g., Permanent, Contract) |
| Discriminator Value | Identification value for each item (e.g., PERM, CONT) |
| Inclusion Mode | Inclusive / Exclusive mode |
Subtypes are visualized as nested boxes within the entity node.
→ Subtype details: Subtypes
Notes & Zones
Auxiliary elements to enrich the canvas beyond entities.
| Element | Purpose | Creation |
|---|---|---|
| Note Node | Design notes, business rules, TODO memos | Toolbar Add Note or right-click |
| Zone Node | Visual grouping of related entities (domain boundaries) | Toolbar Add Zone |
- Notes support rich-text editing (bold, italic, lists, etc.)
- Placing entities inside Zones creates visual domain boundaries that greatly improve readability
→ Detailed guide: Notes & Zones